THIS GNSS RECEIVER IS OBSOLETE AND NOT ACCEPTED ANYMORE!!
Since the arrival of full-frequency GNSS receivers at a very similar price, this dual-frequency solution is no longer relevant.
Do not buy the hardware below!!
List
Here is the list of elements required to set up a dual-frequency GNSS base using the Ublox F9p module: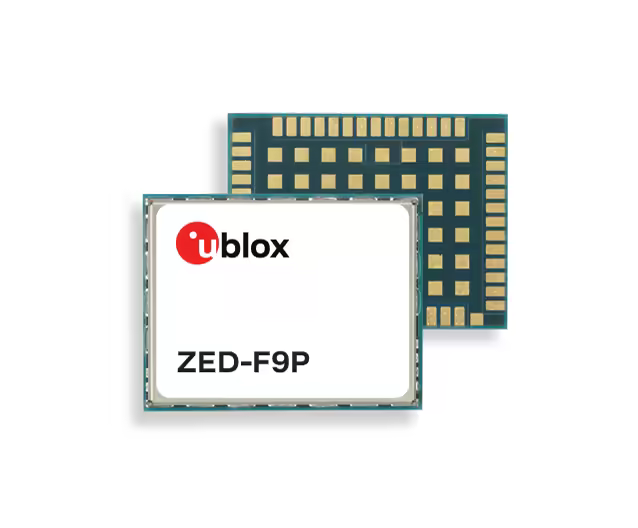
| Hardware | Price (excl. tax) |
|---|---|
| F9P drotek: 5% discount code CENTIPEDERTK or F9P ardusimple | 180€ |
| D910 antenna or survey, not the ublox ANN-MB!!! | 100€ |
Assembly
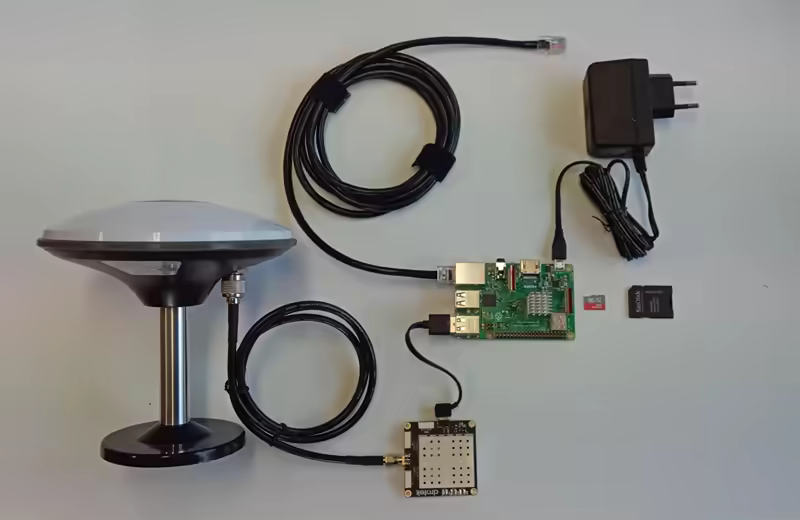
First, perform an initial assembly without the enclosure:
- Assemble the DA910 antenna on its mount
- Connect the antenna cable to the F9P receiver
- Connect the USB cable between the F9P and the Raspberry Pi 3/4
- Connect the RJ45 ethernet cable to your network (internet router, powerline adapter, RJ45 wall socket) and to the Raspberry Pi 3/4
- Prepare the power supply but do not power it on yet.
Update the firmware of your GNSS F9P module
First, you must update the firmware of your GNSS F9P module:
- Install U-center (Windows only). Be careful not to install U-Center 2, but U-Center:
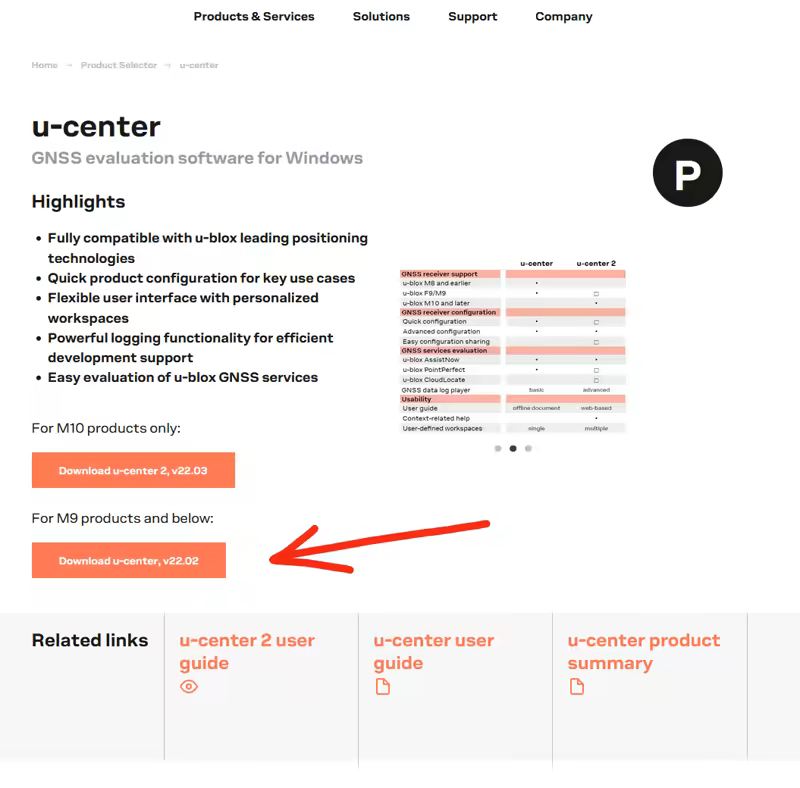
If U-Center refuses to start with an error such as "MSVCR120.dll not found", install this package: vc_redist 2013 x64.
- Update the F9P firmware:
- Download the latest firmware update file. As of 2026-03-15, the version is 1.51
- Connect the F9P receiver to your PC via USB
- Open u-center
- Connect the receiver (button at the top left) to the correct COM port
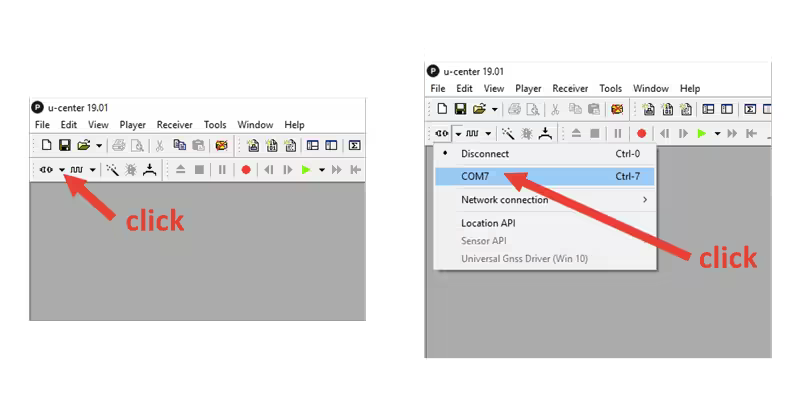
- Verify that the receiver is correctly connected

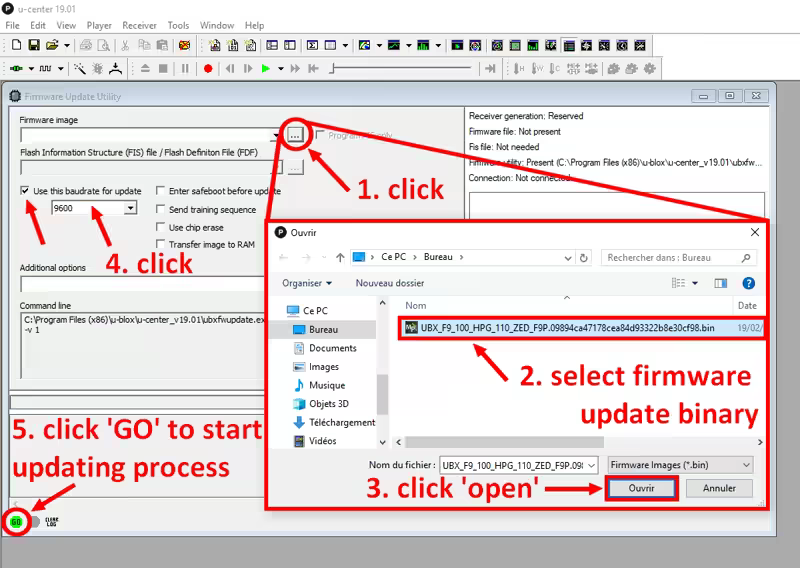
Click Tools > Firmware update...
- Select the previously downloaded
.binfile in Firmware image - Check Use this baudrate for update and select 9600
- Uncheck the other four options (Enter safeboot, ...)
- Select the previously downloaded
Click GO (bottom left of the window)
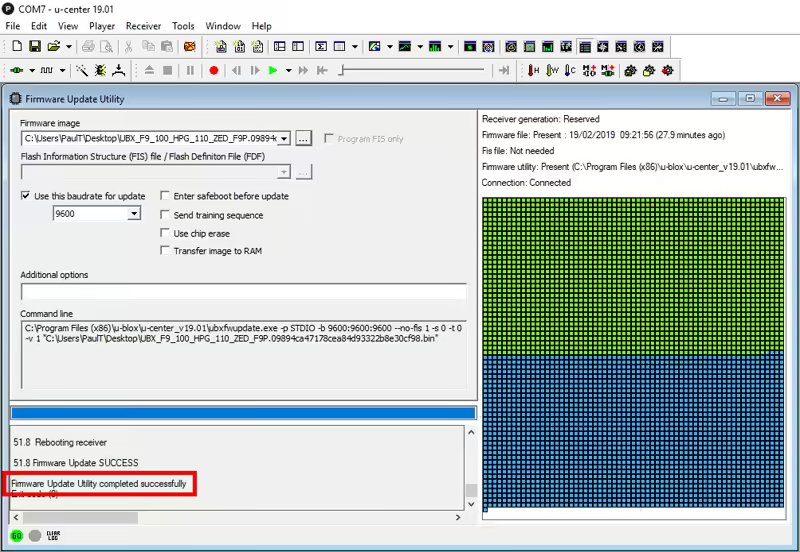
- Wait for the update procedure to finish
Finally
- Take the Micro SD 16GB and proceed to the next step: Software installation